How do I set things up right after signing up?
Last updated: 2026-08-28
Right after you sign up, you'll see a "Quick Start Guide" badge at the top of the admin screen. Follow it in this order (steps 1, 2, 5, 6, and 7 are required; steps 3 and 4 are optional).
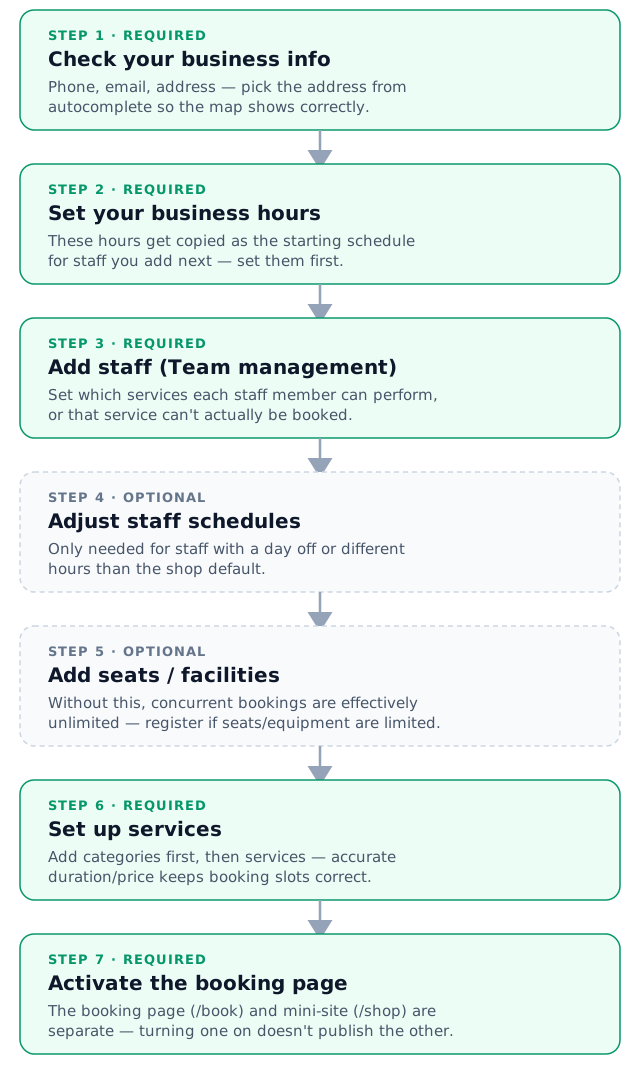
Step 1 · Check your business info
Make sure your phone, email, and address are correct. This information is used for customer notifications, booking confirmations, reminders, and the map shown on your booking page and mini-site.
- A typo in your email means email notifications won't reach you when Kakao AlimTalk or SMS fails and falls back to email.
- Pick your address from the autocomplete list — typing it by hand doesn't save map coordinates, so no map will show on your booking page or mini-site.
Step 2 · Set your business hours
Set your real operating hours. Until you save this, everyone sees a default of Mon–Fri 9am–6pm, closed weekends.
- The hours you set here get copied as the starting schedule for any staff member you add in the next step — set this first so that copy is correct.
- Double-check the "Shop timezone" on the same page. If it's wrong, every booking time is off — it's auto-set from your address at signup, but can be left on UTC if that couldn't be resolved.
- Add lunch or mid-day breaks per day as "breaks". One-off holidays and temporary closures go in the separate "Closed periods" settings, not here.
Step 3 · Add staff under Team management (Free: yourself only; Starter+: no limit)
Register whoever bookings should be assigned to.
- The Free plan allows 1 team member. Register yourself with your name, photo, and bio — this lets bookings be assigned to you. Upgrade to Starter or above to add more staff.
- In the staff form, be sure to set "services this staff member can perform". If a service has no capable staff, it still shows on the booking form but offers no available times, so customers can't actually book it.
- Starter and above send an invitation email to the staff member automatically.
Step 4 · Adjust staff work schedules (Optional)
A newly added staff member's hours default to the business hours you just set in step 2. Only adjust individually if someone has a day off or works different hours.
- Changing business hours later doesn't automatically update existing staff schedules — edit them here directly if needed. (Time off and absences are managed separately from work schedules.)
Step 5 · Add seats / facilities (Optional)
If you have a limited number of seats or equipment used at the same time (e.g. 2 wash basins, 1 perm machine), register them. Skip this if you have no physical bottleneck.
- Important: if you don't register seats/facilities, concurrent bookings are effectively unlimited. With 3 chairs but nothing registered, the system will happily accept 4+ bookings in the same time slot.
- Register seats/facilities here first, then check the "required seats/facilities" on each service in Service settings for the limit to actually apply. That checkbox doesn't even appear on the service form until at least one resource exists.
Step 6 · Set up services: categories + services
Use "Add category" for groupings like Cuts/Perms/Colour, then add services under each. Services with no category land under "Other".
- Important: checking "Use options" on a service zeroes out its base price and duration and pulls them from options instead. You must then add the sub-options (name, price, duration) — without them, customers see an empty $0 service.
- "Apply to all staff" is checked by default when creating a service. If you unchecked it, assign the service's staff in Team management or it can't be booked.
- Enter accurate duration and price so booking slots calculate correctly. If you set up seats/facilities in step 5, also check the ones each service needs here.
Step 7 · Activate the booking page
Once your services are set up, go to Booking & Payments settings and turn on "Enable booking page" to start taking online bookings.
- You need at least 1 service registered, with staff assigned to it, for customers to actually complete a booking.
- The "booking page" (
/book) and the "mini-site" (/shop) are separate. Turning on the booking page does not publish your mini-site — that's a separate "publish" switch in mini-site settings, and depends on your plan. "Payment integration" on the same page is also a separate feature (Growth plan and above).
Once these 7 steps (5 of them required) are done, your public booking page is fully live.
Free vs. paid plans
- Free: solo owners get this forever, for free. For example, a nail salon owner running the business solo can keep using service registration, business hours, the mini-site, and booking management indefinitely without paying.
- Starter / Growth: teams of 2+ get a 14-day free trial before billing starts. For example, a hair salon with the owner plus one stylist and one assistant becomes a 3-person team, and the 14-day trial starts the moment that second staff member is added. During the trial, email and app push notifications send normally; SMS and Kakao AlimTalk require purchased credits to send.
Can't find what you're looking for? Contact us →